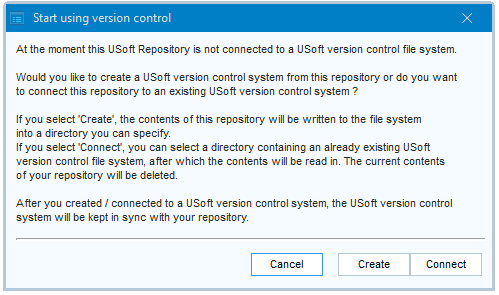
To bring a USoft application under version control for your team, you must first put it in place by taking explicit one-time action. This is referred to as Create.
Known problem: Display order of C/S ESI objects jumbled after transition to version control
If you have defined ESI objects (GUI "paintings") for a Windows application, when you start using version control for the first time, you may find that the display order of sibling objects (for example: fields in a group) has been jumbled up by the transition to version control.
To fix this, in Windows Designer, set explicit values for the Position property of these objects that indicate the desired order. If you omit this, the order may continue to change with each Synchronize action.
To create version control for a USoft application in Development:
- In the USoft application (USoft Definer, USoft Service Definer...) that you want to bring under version control, from the tool menu, choose Tools, Version Control, Version Control Configuration. This dialog appears:

- Click the Create button. Specify the file directory where you want the files for version control to be written to initially, then click Save.
- Inspect the result on the file system. See that files have been created for all objects in your repository. See also that at the top level, a file has been created named
where ".usv" is for "USoft version control" and application is the abbreviated name of the USoft application, for example, for USoft Definer:application.usvUSD.usv - Set up a Git (or other) remote repository. Arrange for the tree of files that was the result of Step 2 to be uploaded initially to that remote repository. This upload step is not specific to USoft. It works exactly the same with any other set of files that you want to bring under version control.
- Make sure all your USoft team members have a powerful enough computer or laptop to run a local working copy of the USoft repository (the set of RDBMS tables that hold your development work). Click here for an indication of hardware and software requirements.
- Instruct each team member to set up the local RDBMS and to set up the connection to the remote Git (or other) repository. These two steps are not specific to USoft.
- Point out to team members the location of the "application.usv” file. They need this information when they Connect.
Now, each team member needs to perform the Connect operation initially as a one-time action. From that time onwards, your team is all set to develop against a version-controlled USoft repository, and version control is largely automatic. Team members pull files that contain changes made by others. USoft automatically notifies them that they need to synchronise their local working copy of the USoft repository (the RDBMS tables) if there are any changes that they have not synced yet. When a team member has finished work on a fix or request, this team member pushes this work to the remote tree so that it becomes available to the others.

