This article describes pages and cards that USoft delivers as a default in the usoft-zero template default for browser-based UIs. This usoft-zero UI/UX is the default that USoft delivers by default.
Info pages
Idea
The usoft-zero default gives you an info page for each table.
When the runtime user navigates to an info page, a multi-record grid appears. By default, the table is queried and the query results appear in the grid:
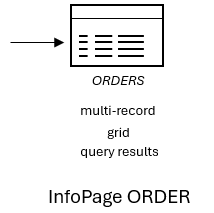
A multi-record display shows multiple records at the same time. A grid display shows columns across and records down. The grid has the purpose of showing query results. The info page as a whole is also intended to do a new search or query. The purpose is not to allow the user to manipulate data.
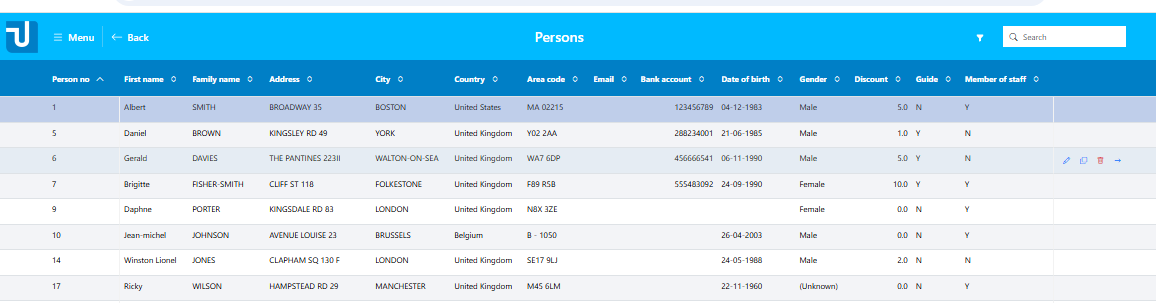
Here is an impression of a default info page multi-record grid for a PERSON table:
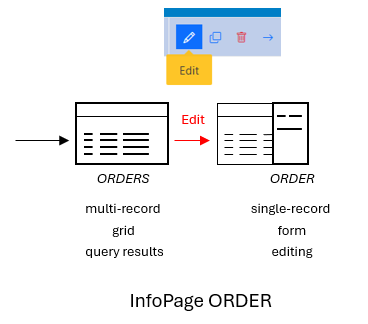
A default info page also contains an off-canvas editing pane, or side pane, that the user can cause to slide into view from the right window edge. It has a single-record form for editing. A single-record display shows data for only 1 record at a time: the record selected by the user in the grid. A form display invites the user to “fill out a form” by supplying or changing data values for individual fields. The form has a separate field for each column in the table. Each field has its own prompt: a text that tells the user what the field is for. The user opens the editing page by selecting the Edit icon button for a record in the grid:
Here is an impression of a single--record form in an off-canvas editing pane for a PERSON table:
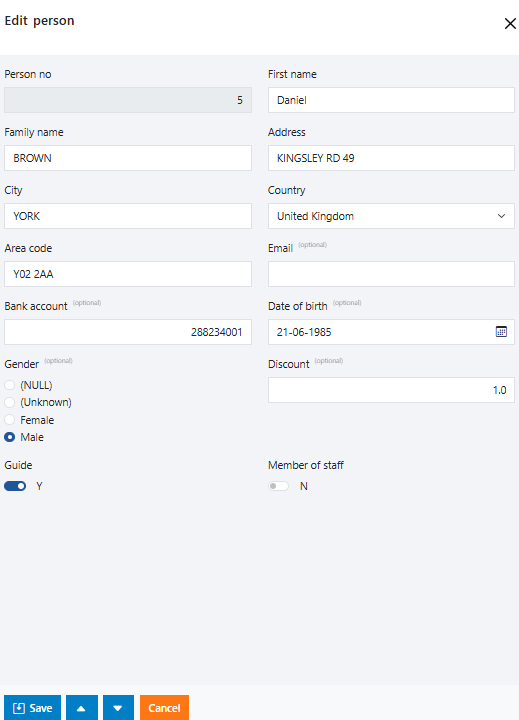
On any navigation, this side pane automatically commits or rolls back. One effect is that transactions are kept short. This is usually a desirable quality in web page design. Another effect is that transaction handling is clear and transparent to the user: it is not possible to leave the side pane without ending the transaction. Any open edits are committed if the user presses Save or navigates to the next or previous record via the arrow buttons. Any open edits are rolled back if the user presses Cancel or closes the side pane via the 'x’ Close icon in the top-right corner. INSERTs and UPDATEs can only be performed in the side pane, not in the multi-record grid, so they are always committed one-record-at-a-time.
The Save button is only responsive if there is something to save and there are no errors.
If you require more complex tranaction handling, you can insert multiple data sources into the same side pane. Depending on details of your case, another way to combine parent and child commits may be to join parent and child data in a single Logical View, and use the default side pane generated for that Logical View.
Implementation
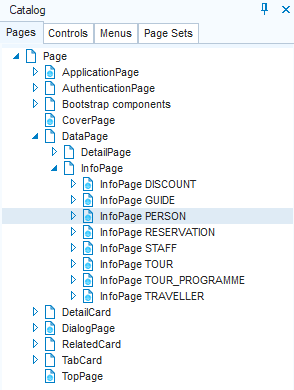
The info page for table PERSON is implemented as an InfoPage class. Find this class on the Pages tab of the Web Designer catalog:
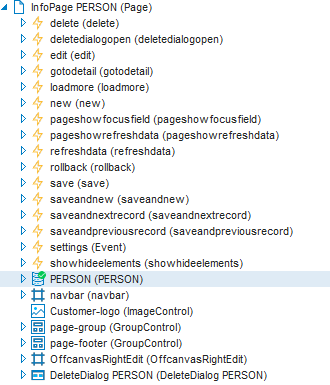
Open the page. In the object tree on the right, locate the PERSON data source object. This data source object is responsible for connecting the web page with the PERSON table in the database and the Rules Engine that enables and controls data access to this table:
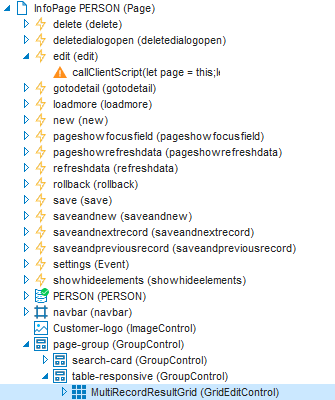
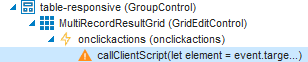
In the preview pane in the middle of the Web Designer tool interface, click on the grid control. In the object tree on the right, locate the MultiRecordResultGrid:
To trace the off-canvas editing pane, expand to find the JavaScript client script associated with its onclickactions event:
This script reads:
let element = event.target.closest('button');

bootstrap.Tooltip.getOrCreateInstance(element).hide();

if (element.classList.contains('row-duplicate')) {
	options.duplicate = true;
	this.trigger('new', [options]);
}

if (element.classList.contains('row-edit')) this.trigger('edit');
if (element.classList.contains('row-delete')) this.trigger('deletedialogopen');
if (element.classList.contains('row-goto-detail')) this.trigger('gotodetail');
The line containing row-edit allows you to trace the off-canvas editing pane to the edit trigger defined at a more generic level in the page:
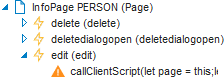
The associated script reads:
let page = this;
let settings = getSettings(page);
event.stopPropagation();
$.udb.wait(true);
settings.offcanvasElement.classList.remove('for-new');
settings.offcanvasElement.classList.add('for-edit');
bootstrap.Offcanvas.getOrCreateInstance(settings.offcanvasElement).show();
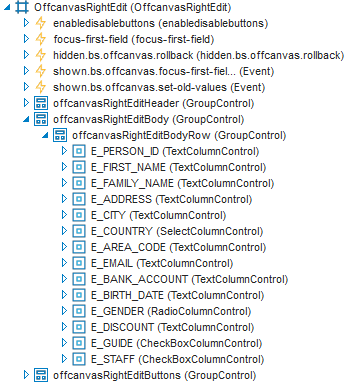
$.udb.wait(false);The penultimate line is responsible for opening the object with class = Offcanvas, which is the OffCanvasRightEdit section. This is the off-canvas editing pane for the PERSON record. Expanding nodes in this section allows you to trace the individual edit fields for columns of the PERSON record. They have names starting with E_… :
Detail pages
Idea
If your data model has a parent-child relationship between tables ORDER and ORDERLINE:
then the usoft-zero default gives you navigation from an info page for parent ORDER to a detail page for child ORDERLINE. The runtime can navigate to the detail page by clicking the Details icon button for the record selected in the info page grid:

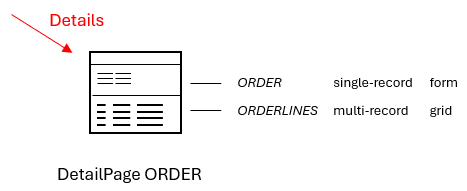
The detail page has a top part with a single-record form displaying the data of the selected parent record, and a bottom part with a multi-record grid displaying corresponding data in the child table:
If there are multiple children (not shown), there is a separate grid for each of them.
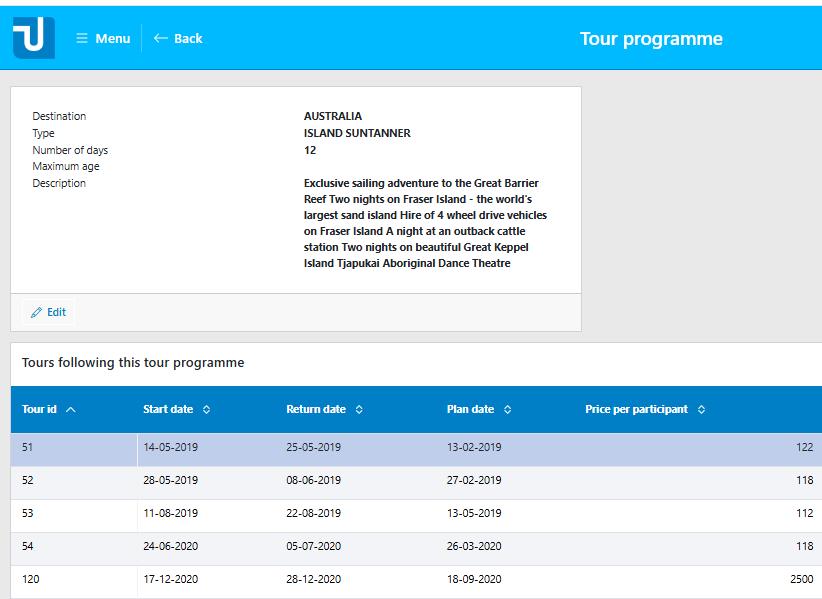
Here is an impression of a detail page for table TOUR_PROGRAMME giving access to details about tours (child table TOUR) following this tour programme:
Implementation
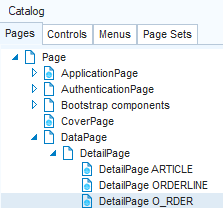
The detail page for ORDER is implemented as a DetailPage class. Find this class on the Pages tab of the Web Designer catalog.
The table is called O_RDER and not ORDER only because ORDER is a reserved word in USoft Definer.
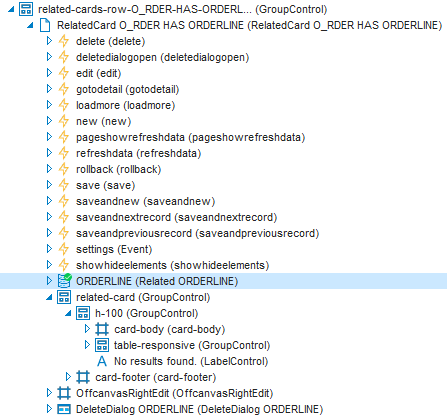
Open this page class, then click on the grid for Orderlines in the preview pane in the middle. In the object tree on the right, locate the related-cards-row… object that represents the bottom part of the page displaying the Orderlines grid:
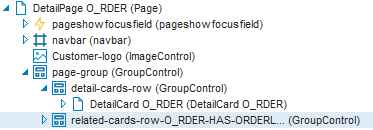
Expand this object node to see what it contains. Locate the ORDERLINE data source object. This data source object is responsible for connecting the web page with the ORDERLINE table in the database and the Rules Engine that enables and controls data access to this table:
Lookup pages
Idea
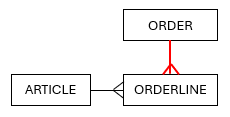
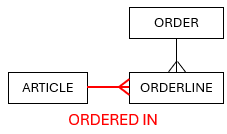
If your data model has a parent-child relationship between tables ARTICLE and ORDERLINE:
then from all the places where the runtime user can manipulate orderlines, the usoft-zero default gives you a navigation possibility to a lookup page for articles. A typical process is that the user starts a new Order, goes to the detail page for Orderlines, and for each individual Orderline, selects an Article.
When adding or changing an Orderline, the runtime user gets an Article ID field with a small Look up button. Clicking this button navigates to the lookup page for Articles. Here, the user can select an Article by clicking it. This Select action will cause the article ID to be copied back to the calling environment, in this case, the Article ID field for the Orderline:
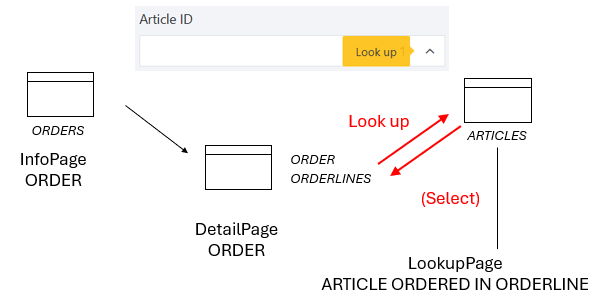
As the picture shows, navigation to a lookup page is a round trip: “go there, select an item, come back”.
Here is an impression of a lookup page for articles. The list of articles is shown temporarily in an off-canvas sidepane displaying a multi-record grid. The runtime user selects an Article by clicking on that line in the grid. This automatically takes him back to the Article ID field for the Orderline:

Implementation
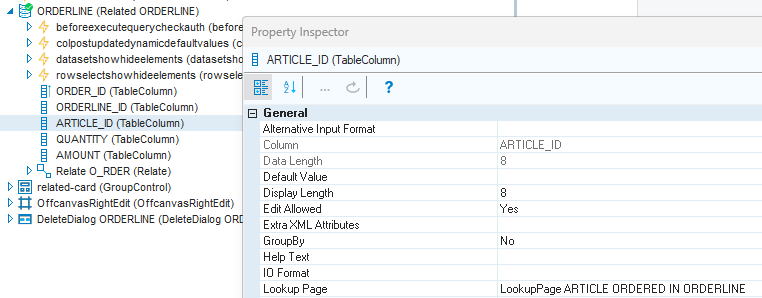
To trace where the lookup button on the Article ID field leads to, locate the TableColumn object for ARTICLE_ID in the ORDERLINE data source:
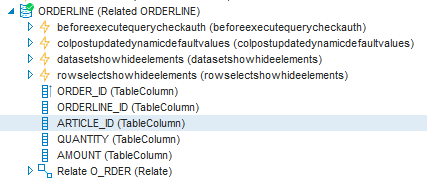
Right-mouse-click and in the Property Inspector, see that the Lookup Page property of the ARTICLE_ID TableColumn is set to LookupPage ARTICLE ORDERED IN ORDERLINE:
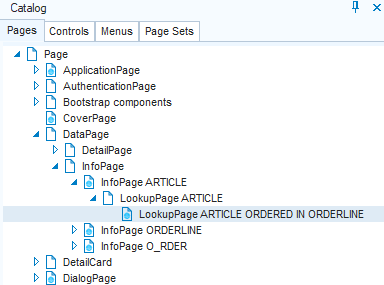
Find this LookupPage class on the Pages tab of the Web Designer catalog:
Re-usable controls
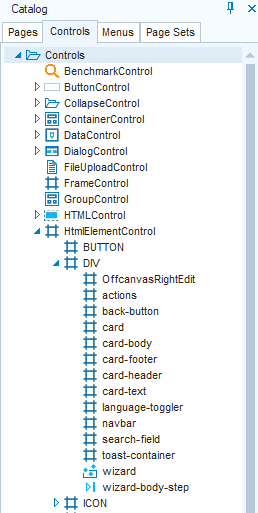
This article discussed various controls created to realise the usoft-zero pages and cards. These controls are available for re-use and customisation. Get them from the Controls catalog of Web Designer under HTMLElementControl, DIV: