This topic is a guide for developers to create the best desktop shortcut for your USoft project binder. A great desktop shortcut will bring you to your project in one click while also allowing you admin rights.
Please meet these requirements before continuing:
- Your machine has USoft installed
- Your machine has a USoft project binder connected to a development database (example below)
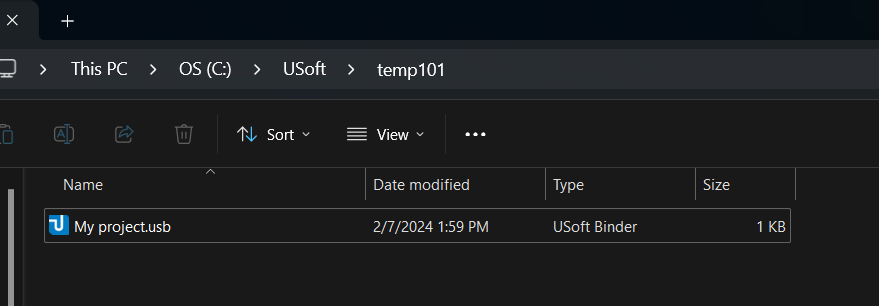
Please contact your project lead if you are not sure whether you meet these requirements.
You were already able to work on your project by navigating to your project binder, but it is nice to have an efficient desktop shortcut. That is what this guide is all about.
After installing USoft on your machine, navigate to <Your USoft installation folder>\bin64 – right click on usbinder.exe – Create shortcut.
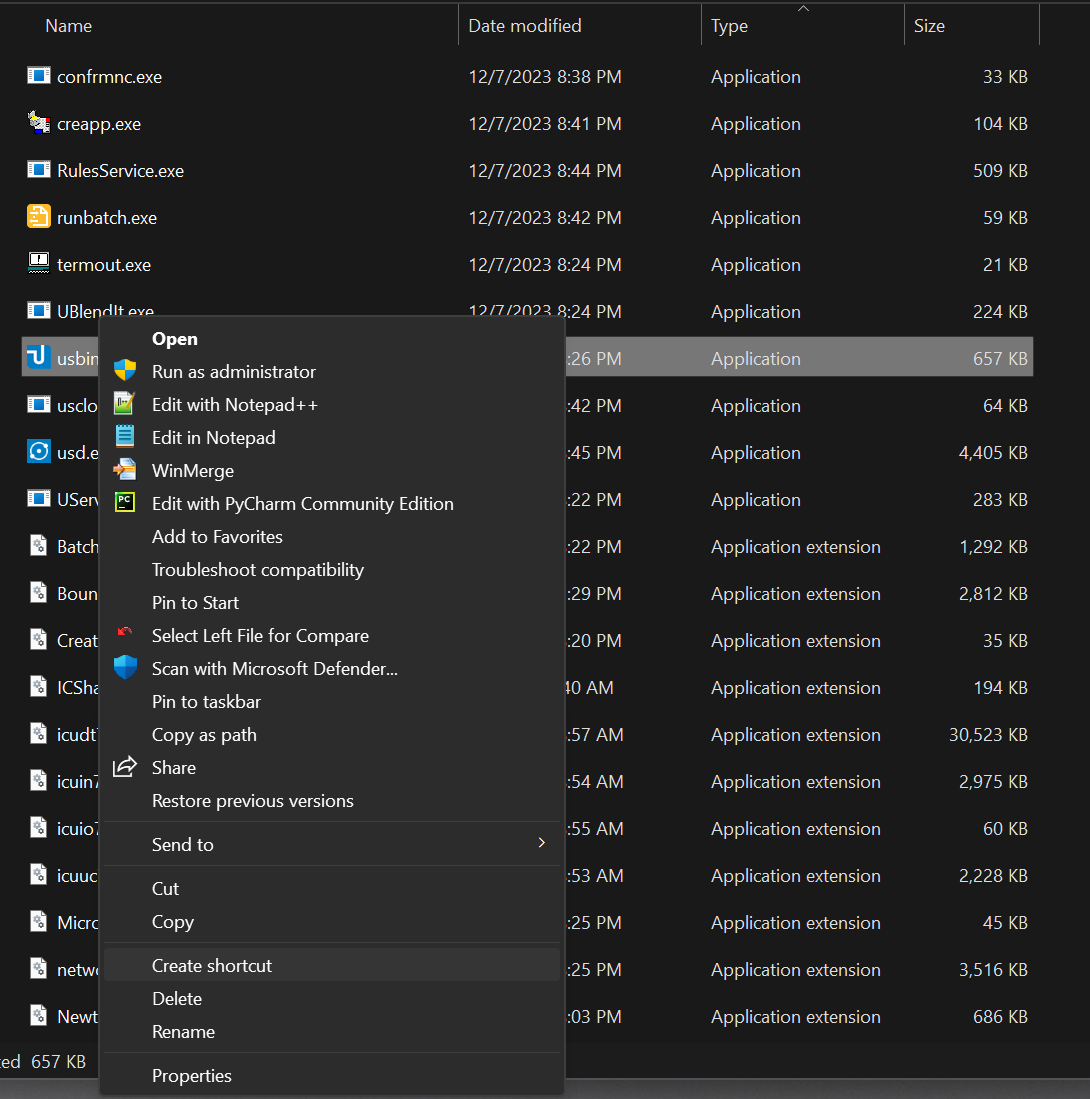
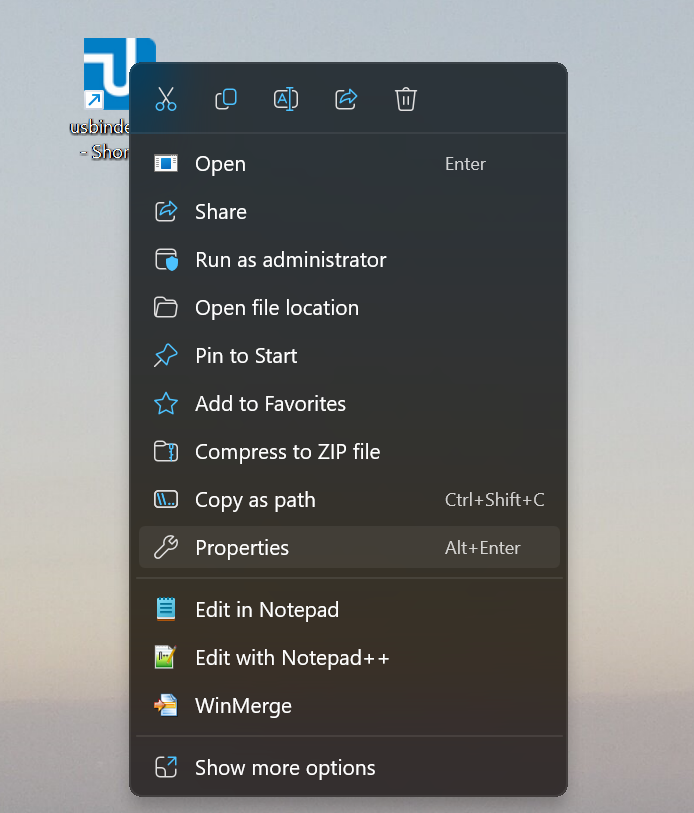
Drag the new shortcut to your desktop. Then right click – Properties.
Open a new file explorer and locate your project binder (.usb file), right click – Copy as path.
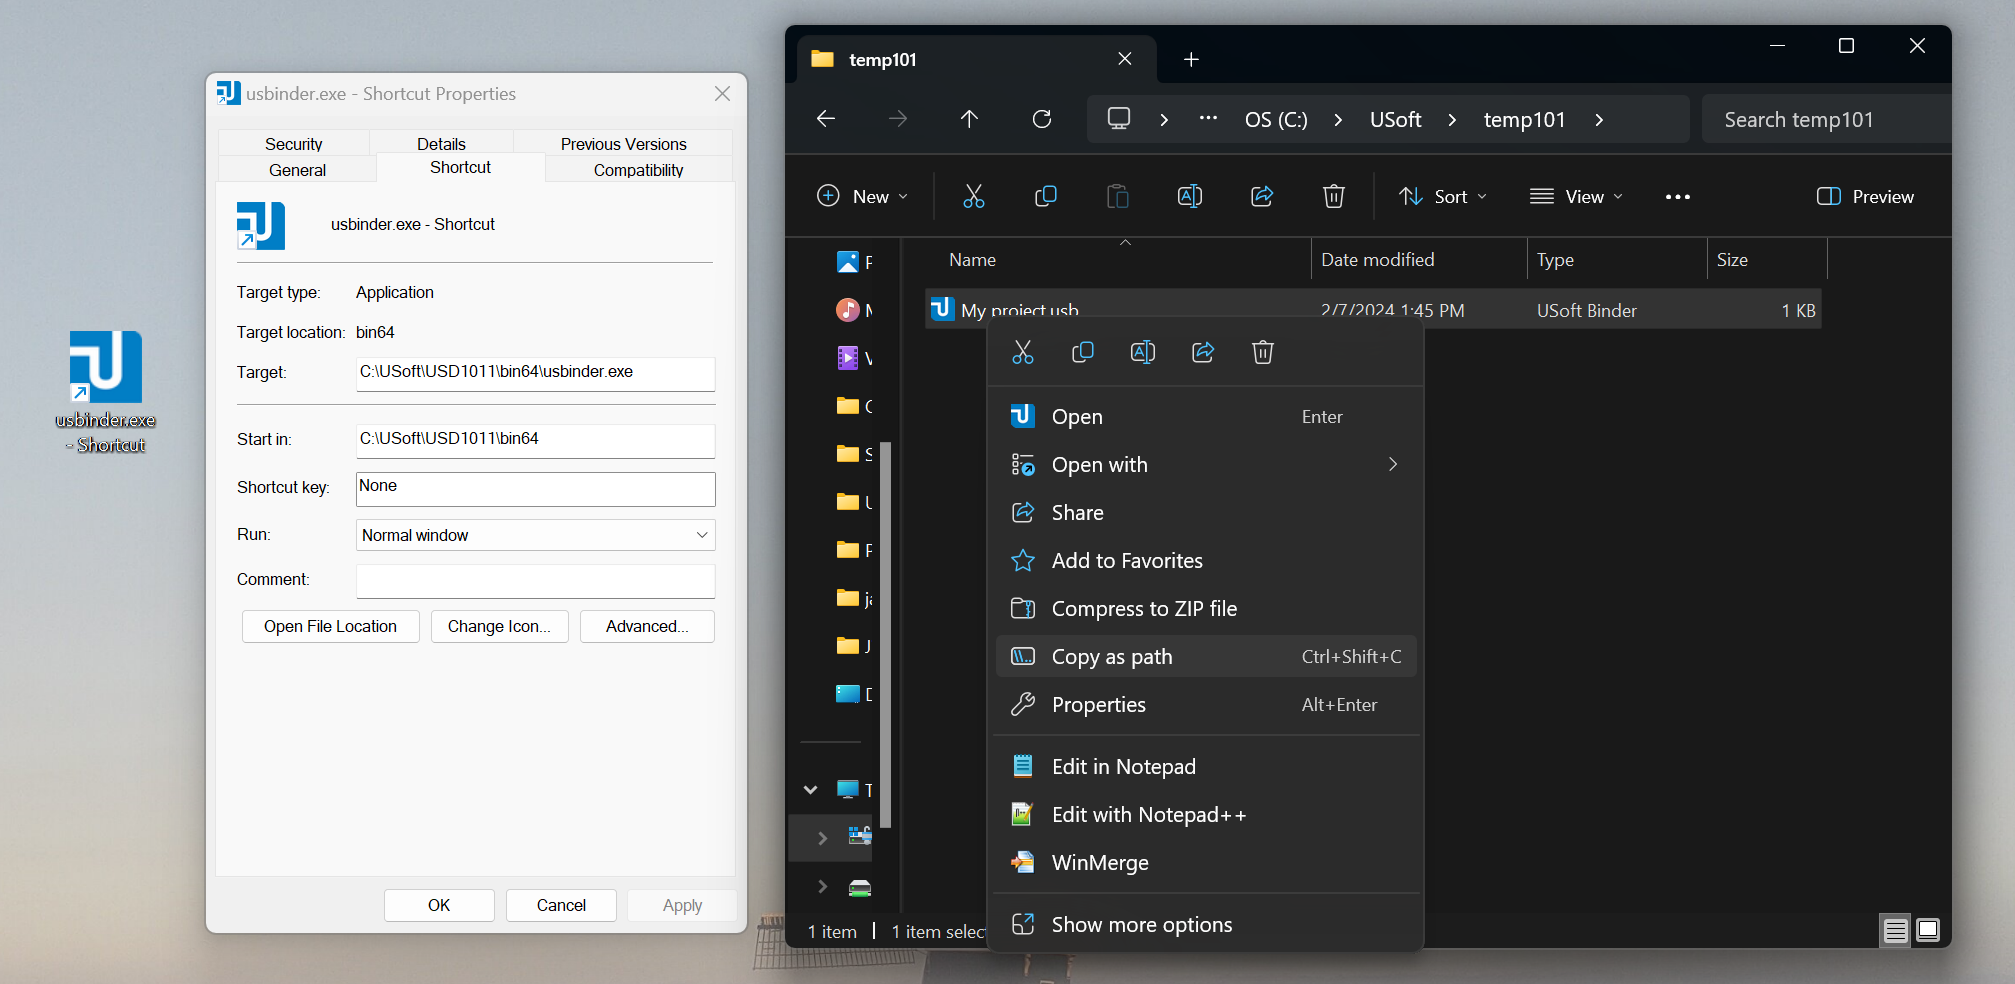
In the usbinder.exe properties window, edit property ‘Target’. Keep the current value, add a space and paste the full path of your project binder.
Edit property ‘Start in’. Remove the current value and paste the folder path that your project binder is located in. Double quotation marks (“) are necessary if your path contains a space.
Your usbinder.exe shortcut properties should now look like this.
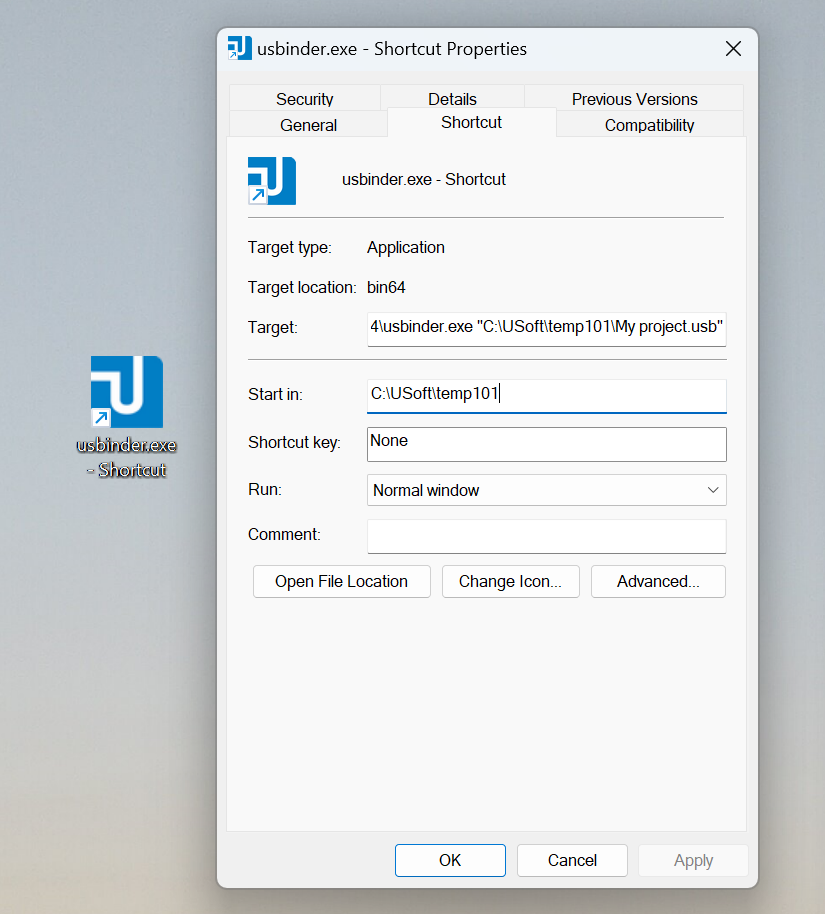
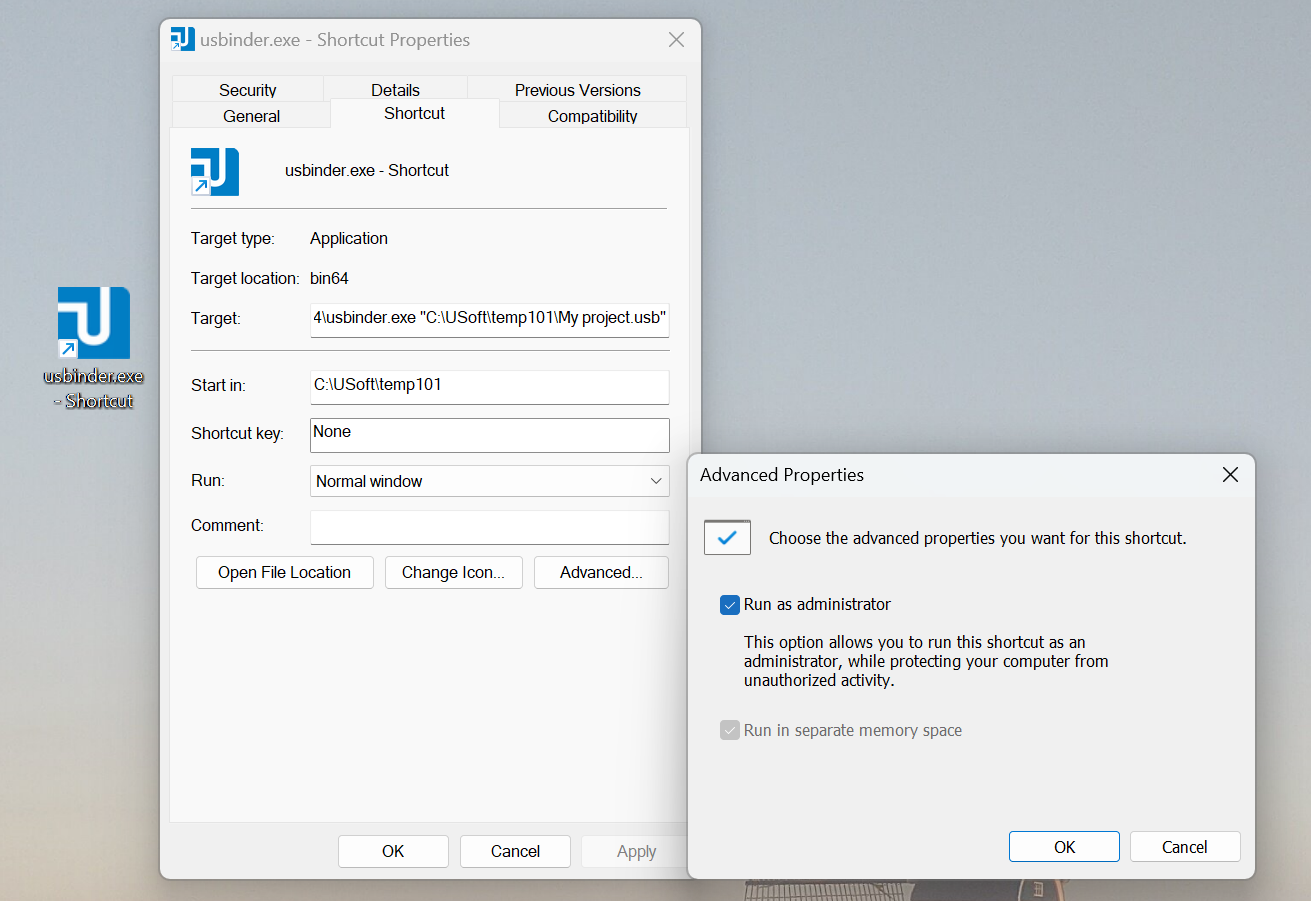
Click on Advanced, check the box ‘Run as administrator’ and click on OK
This will allow you to access all functionalities of your USoft binder items such as publishing web pages.
Rename your usbinder.exe shortcut so you can recognize that this shortcut will redirect you to your specific project. Click on OK to finish editing the shortcut properties.
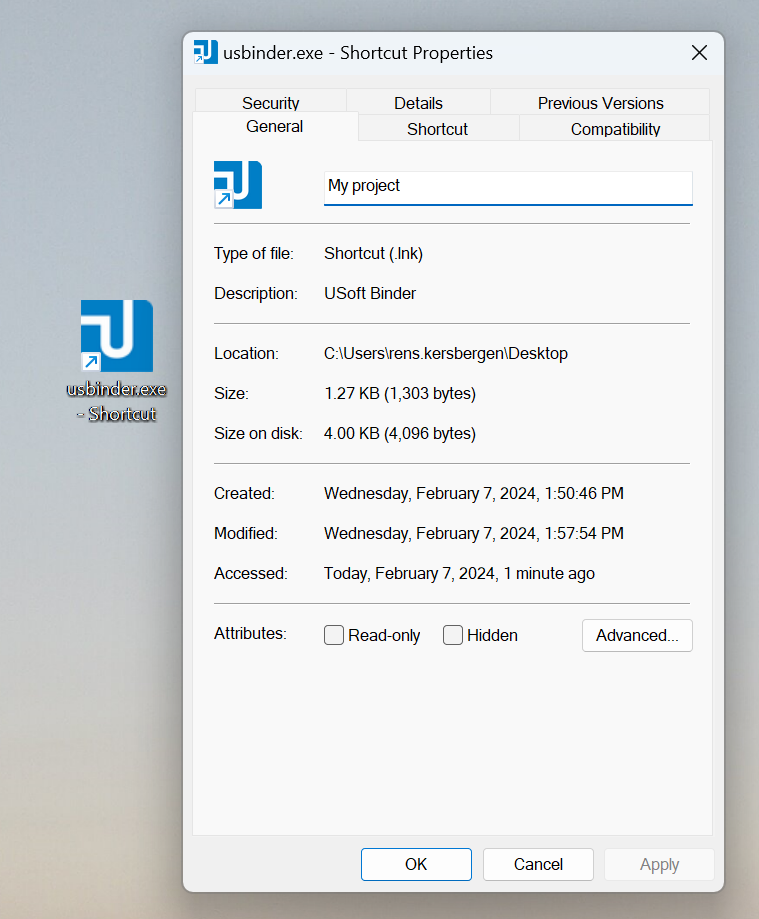
You have finished creating a great USoft project binder shortcut on your desktop. Test your changes by double clicking the shortcut which should start your project binder with administrator rights.

