This instruction is a suggestion on how to setup a environment for a USoft project. Be aware that there are many alternatives that might suit your project better. Please consult support@usoft.com if you are not sure whether these settings are adequate for your project.
If you want to set up your database more quickly and care less about configuring the details yourself, use one of these UBlend scripts https://docs.usoft.com/#Repositories/Blend%20directives/pcNewUDevelop.md https://docs.usoft.com/#Repositories/Blend%20directives/pcNewDatabaseForUSoft.md
Requirements:
- A server machine for working on your USoft project
- SQL Server Manager Studio (SSMS)
- USoft license
- USoft software
-
Create new database
The following server settings are mandatory if you are using SQL Server for your USoft project. Please contact support@usoft.com if your own requirements clash with the settings in this instruction.
Open SSMS, connect to the server that corresponds with the server you are going to work on.
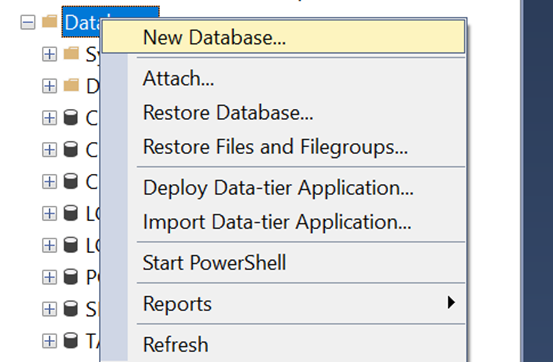
In the object explorer, right-click on Databases and select ‘New database’
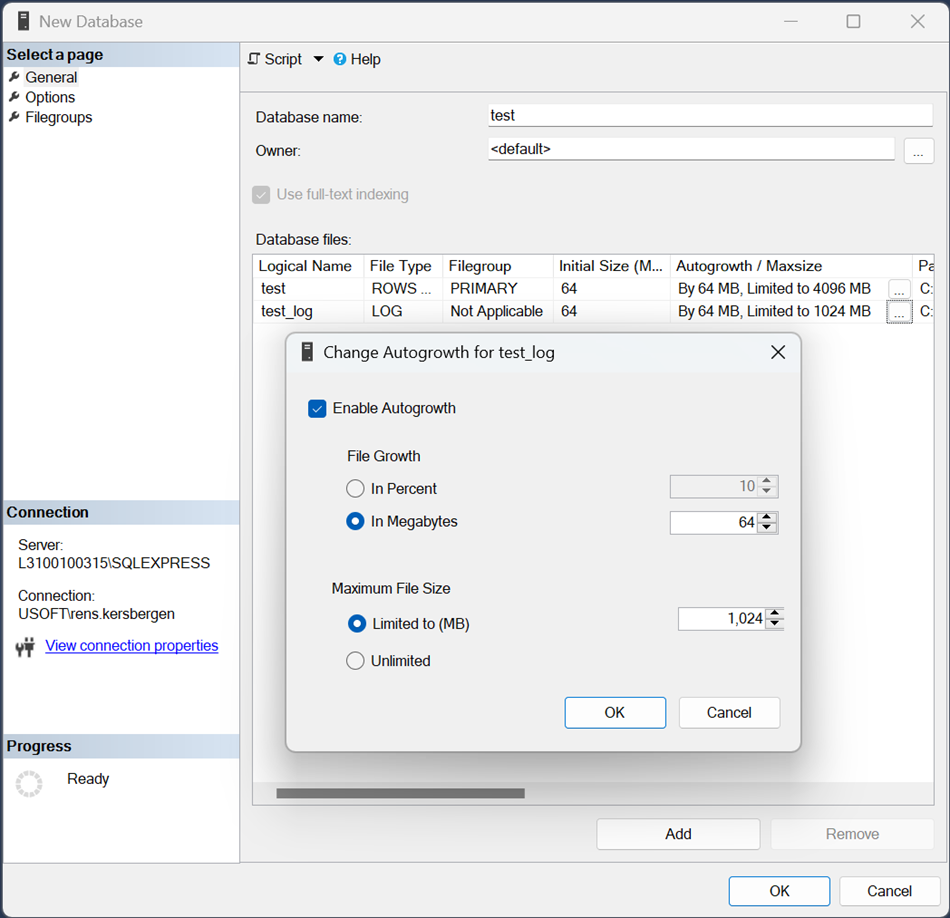
Fill out these values:
- name (the name is difficult to change after this point)
- initial size : 64
optional: Maximum file size 1024MB
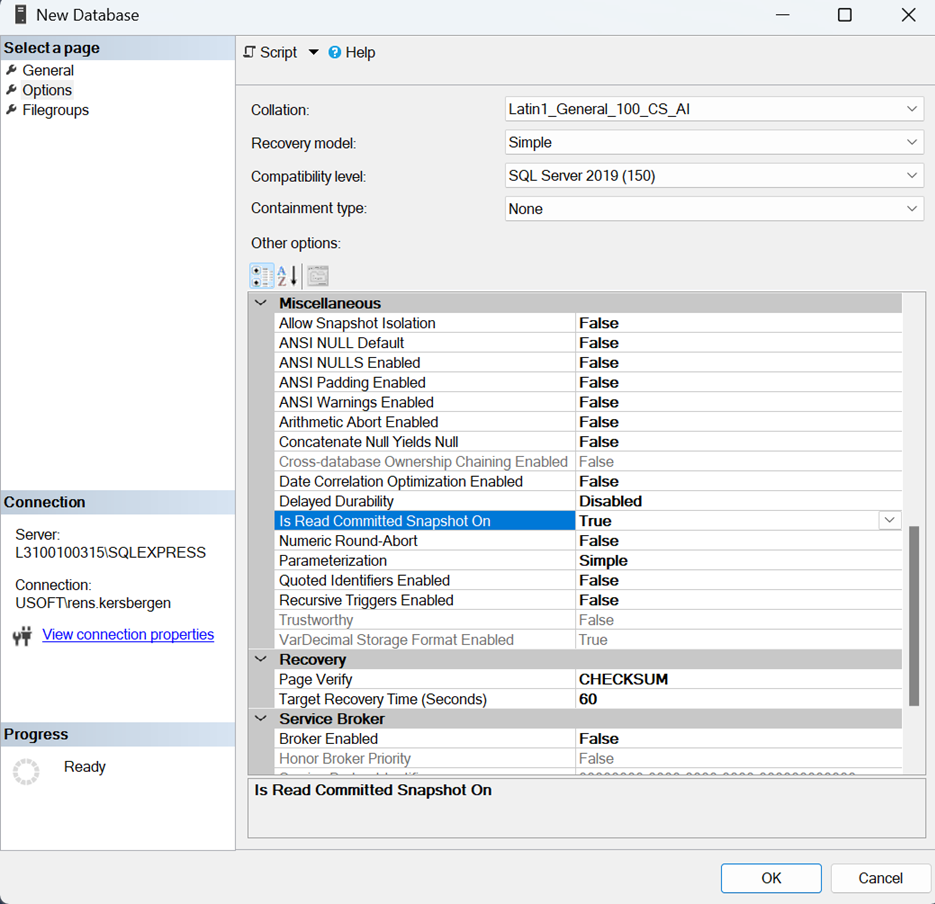
- Check your Server Collation setting by executing this query SELECT SERVERPROPERTY('Collation');
- If the result is SQL_LATIN1_General_CP1_CI_AS, you may select this value: options - collation: Latin1_general_100_cs_ai
- If the result is different, please use that value or change the setting safely after consulting the online sources on SSMS collation settings.
- options - recovery model: Simple
- options – other options – miscellaneous - is read commited snapshot on: true
OK
-
Create new Login
These settings are recommended, but not mandatory.
Navigate to Security, right click on Logins and select ‘New login’
- Fill out a Login name
- SQL server auth (For more secure and large production environments we recommend Windows Authentication)
- Fill out a password in Password: and Confirm password: (This password can be changed later.)
- Deselect enforce password policy
- Default database: >your new database]
- Default language: English – us_english
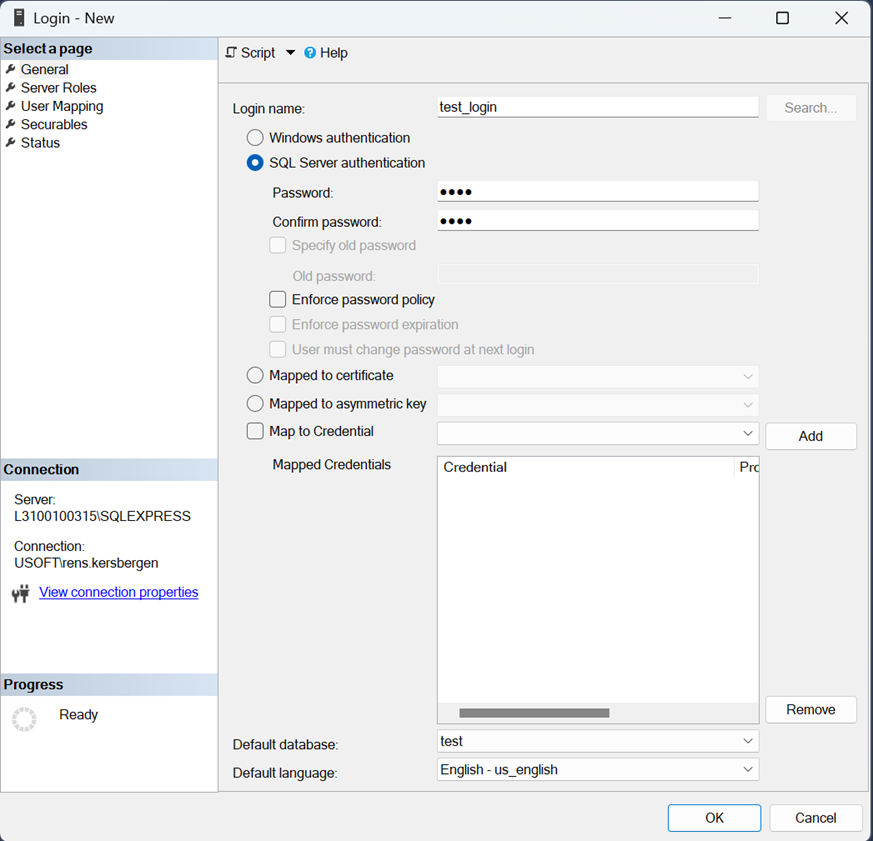
- in user mapping, select pyour new database] and fill out the name of your new database in default schema

- OK
-
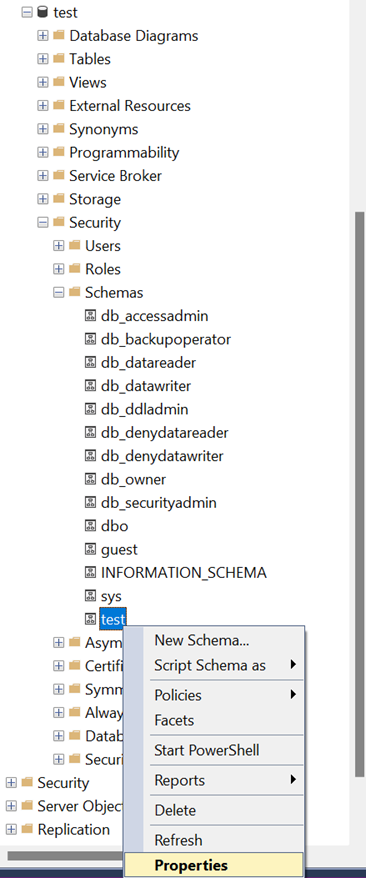
Link your Login to your Database
These settings are mandatory. Please contact support@usoft.com if your requirements clash with the settings in this instruction.
Navigate to: syour new security - schema – [your new database] - properties
- Check if the database owner is correct
- permissions - search - browse: and check your database
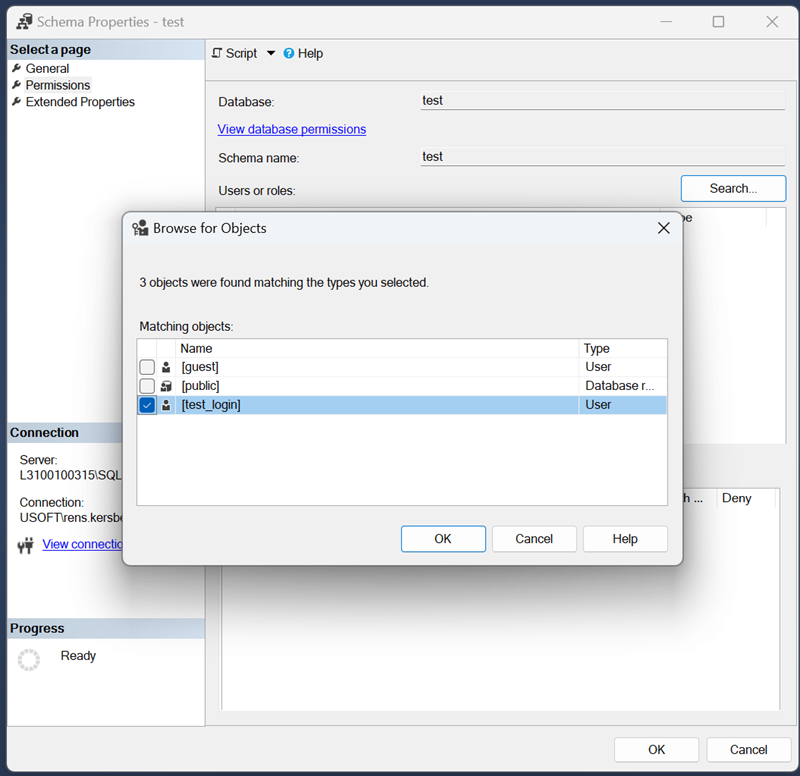
- OK, and stay in the window with the list of permissions. A list of explicit permissions for your Login are displayed at the bottom.
- Select ‘Grant’ for Create sequence and View definition

- click on the blue ‘view database permissions’ - hyour database]
Select ‘Grant’ in the following checkboxes:
- create function
- create procedures
- create synonym
- create table
- create view
- showplan
- view definition
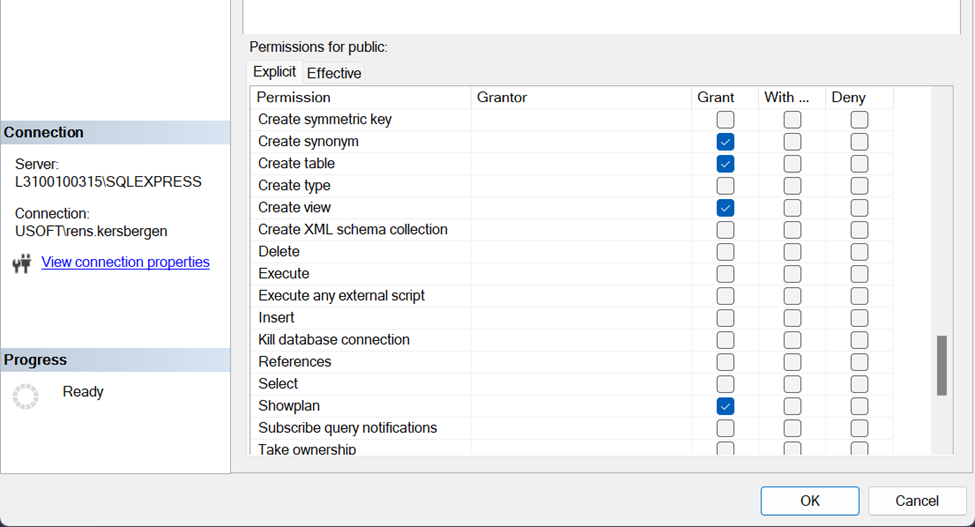
- OK
- disconnect from object explorer
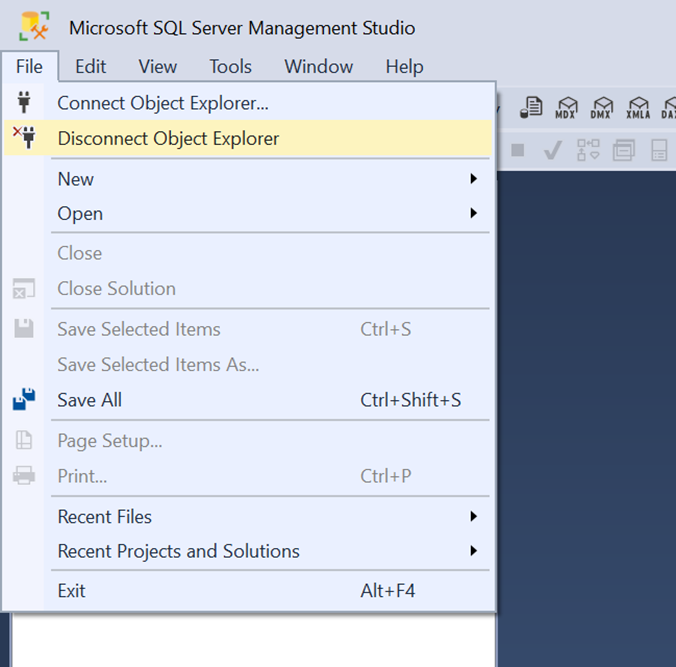
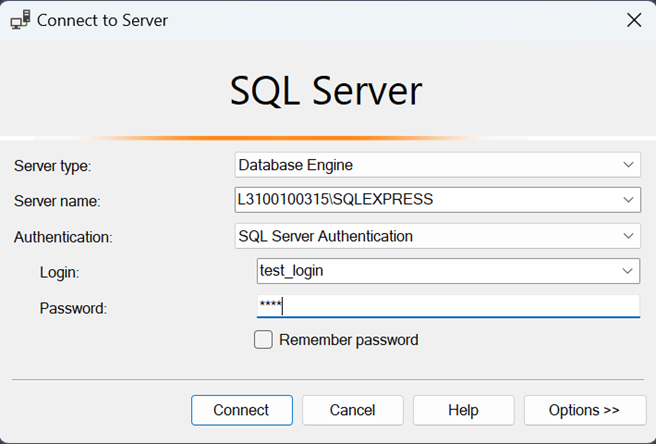
Connect to the object explorer again with your new login.
- Test your new database and your rights in the database with a SQL query. Select ‘New Query’ and write a test. E.g.:
CREATE TABLE test_table (
id INT,
name VARCHAR(50)
);
INSERT INTO test_table (id, name) VALUES (1, 'Business rules');
INSERT INTO test_table (id, name) VALUES (2, 'USoft rules');
SELECT * FROM test_table;
DROP TABLE test_table;
If you do not encounter any errors, your database is set up correctly. You can now link this database to a USoft binder. To set the binder properties to your new database, please follow the instructions below.
-
Link your database with a USoft project
Install USoft. Refer to ocommunity topic] on how to install USoft or contact support@usoft.com for assistance.
When the setup has finished, create a subinder.exe shortcut. For instructions on how to create the most efficient shortcut, please refer to n
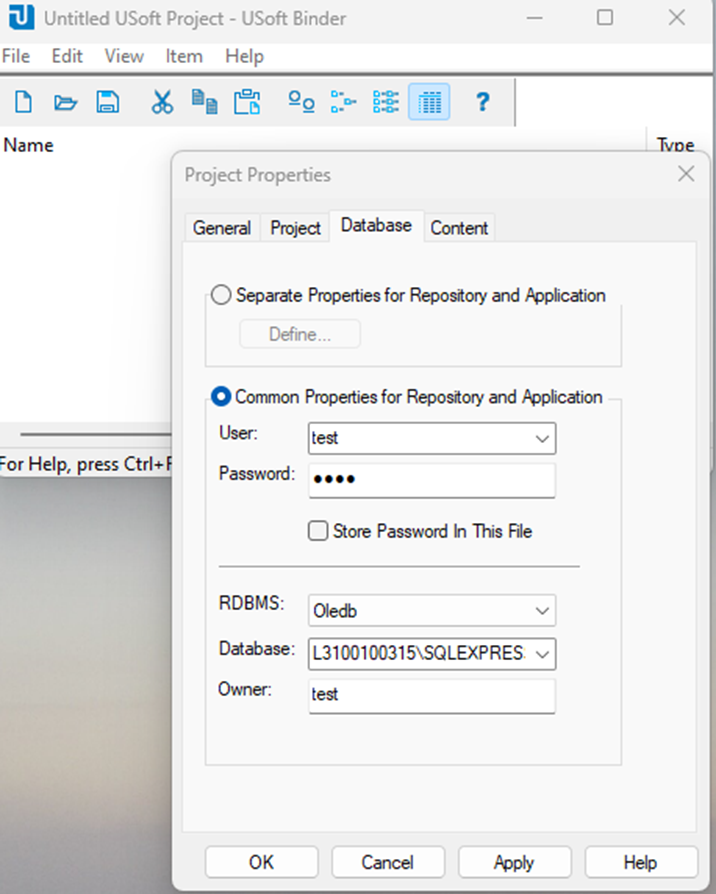
Open a USoft binder and navigate to File – Binder properties – Database
Fill out the details of your database
- Project name
- iyour database login]
- password
- Oledb
- database: ‘dmachine name]: Als je SQL Express gebruikt: ‘bmachine name]\SQLEXPRESS:�your database]’ - lyour database]