

The Windows Designer has a few defaults that cannot be changed because they would break existing applications. Some of these applications have been around for more than 25 years! Therefore, at the start of a new project I start with a few simple changes to make life easier and improve the look-and-feel of the application under development.
1. Add an accelerator to the save button in the Main Menu
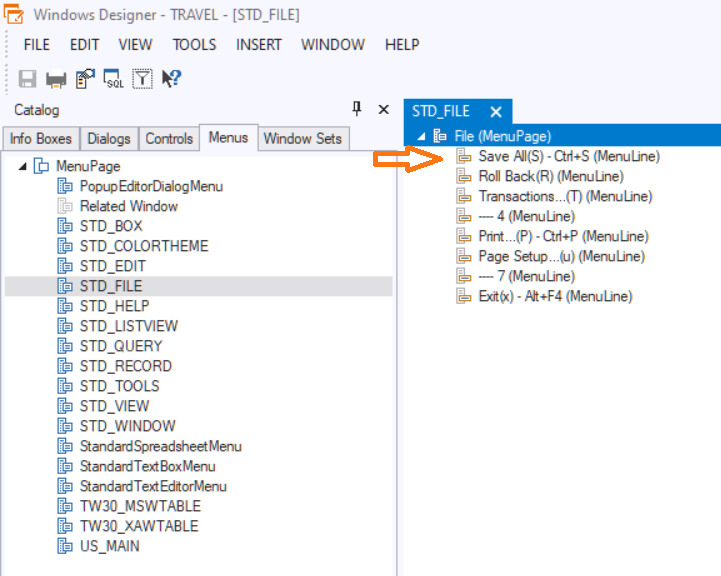
The save option has no accelerator, a keyboard combination to execute a function, to save changes of application data. Normally we advise not to change items in the default menu, yet in this case it will do no harm. The best way to do so is to change the menu page "STD_FILE". This page is embedded in the default menu page "US_MAIN", but if you built an application specific menu you can easily reuse this menu page.
Steps
- Open the Designer.
- Open the Menu page "STD_FILE".
- Select the menu item "Save".
- Open the Property Inspector.
- The topmost property is Accelerator. Add the value: Ctrl+S
- Save your change.
- Run the end-user application and check that the save button can be activated by pressing the Control (Ctrl) key and the "s" simultaneously.
2. Change the look of Related Info Boxes
Historically all data was displayed in separate columns, either in one row, or in five rows for Related Info boxes. As related info boxes are often embedded in other Info Boxes, to create a parent with children look, this default cannot be changed without a major impact on existing application. For performance reasons and leaner Info windows you really want to use the spreadsheet look. This is another simple change with a lot of impact, so
Steps
-
(Assuming you still have the Designer open) open the Related Window Info Box.
-
By default, Related Window (Style Sheet) is selected, so you can open the Property Inspector.
-
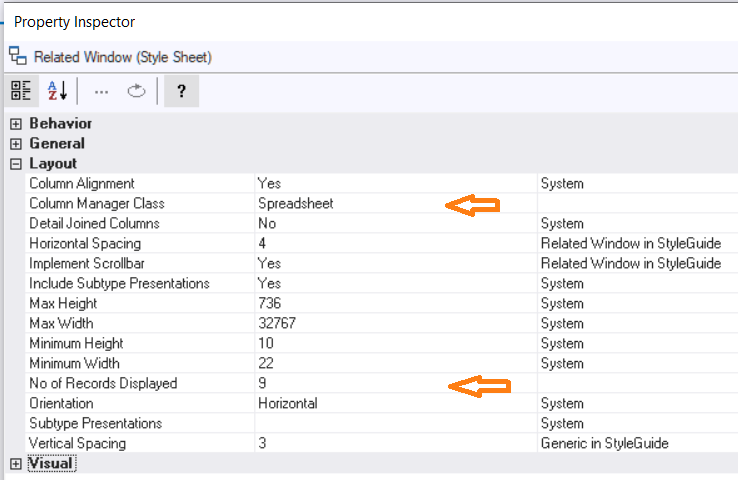
Select the Layout property "Column Manager Class"
-
Change the value to "Spreadsheet"
-
(optional) change the value for Layout property "No. of records Displayed to 10.
-
Save your changes.
Now Related Info Boxes can show more data and yet use less memory than in the default situation.
Another change I always do at this level is to set the Generic Property "Automatic Synchronisation" at "When Visible. Especially at Windows with a Tab control and a lot of related windows on Tab pages, this reduces the number of SQL statement sent to the database when people scroll through the Main Info Box.
3. Change the moment a lookup window executes an initial search
A change that may seem a bit superfluous is to move the query a Lookup Window executes when opened, from the "Startup" Behaviour property to "post-open". Yet it makes a difference in the end-user experience to see a Window doing something instead of waiting for a Window that doesn't seem to open.
Steps
- (Assuming you still have the Designer open) open the Lookup Window Info Box.
- Open the Property Inspector.
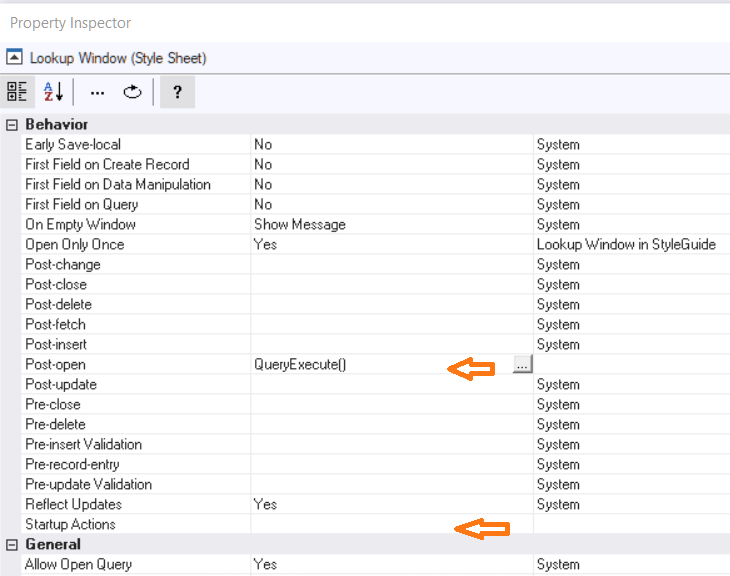
- Select the Behaviour Property "Post-open".
- Set the value to: QueryExecute()
- Select the Behaviour Property "Startup Actions".
- Clear the value.
- Save your changes.
The "Lookup Window (Style Sheet)" Info box has four buttons. The latter is called Table. History again. I usually remove it (simply select the Button and choose Delete from the Secondary Mouse Key Menu), but you are free to rename and reuse it. Lookup Windows tend to show a restricted number of columns (by design). I sometimes make the Button open a single record view (Secondary Window) of the selected row.
In that case change the value for action to: CurrentInfoBox().RecordSingleView() or CurrentInfoBox().WindowCreateSecondary(). I prefer the latter. Both methods accept the name of an Info Box as a parameter. With the latter action it's easier for me as a developer to understand where a painted Info Window is stored in the Windows Designer.
4. Remove the group border at Generic level
The group border adds a small line around all info boxes. This used to be a nice style in older Windows versions, but it doesn't look nice in the new look of Microsoft Windows as used in Windows 8, 10 and 2016 server. Therefore I overrule this setting from the default layout.
Steps
- (Assuming you still have the Designer open) open the Generic Info Box.
- Select the object "Generic (Style sheet)"
- Open the Property Inspector.
- Select the Visual property "Border Type"
- Change the value to "None" using the dropdown list.
- Save your change.
I used the Tours Info Window and added a tab with a Related Window. This is before the change of the Generic Style sheet:
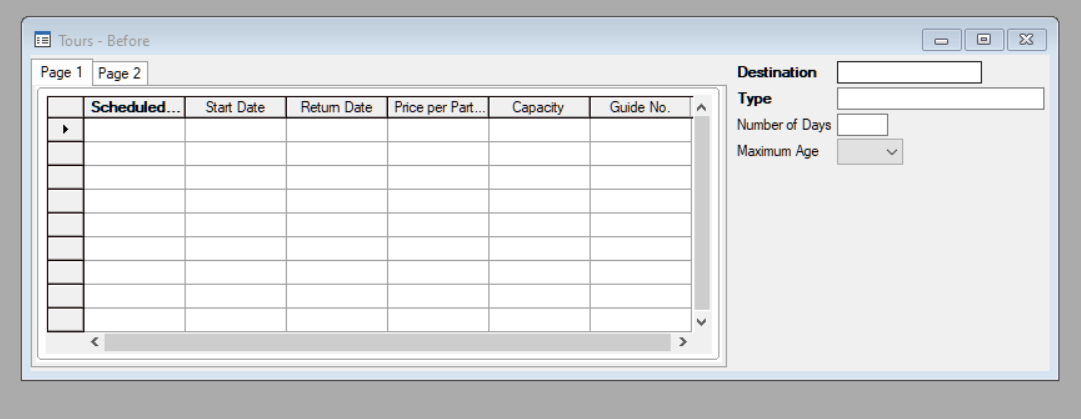
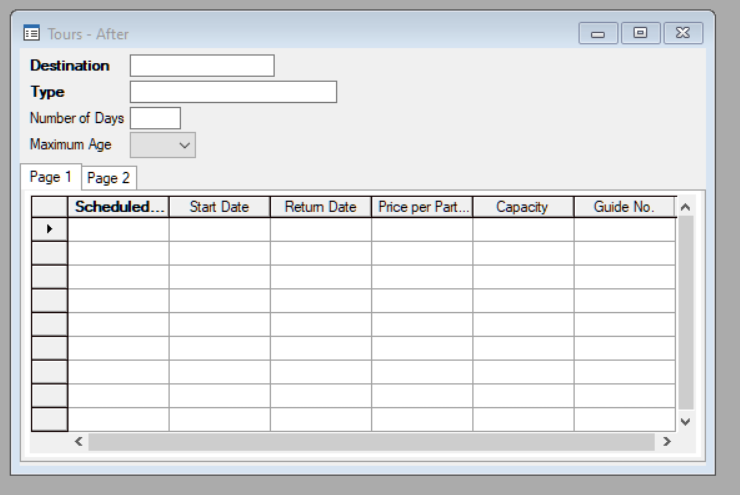
And this is after the change. Take note of the lines under "Page 1":

As you may see this setting makes a small difference, but the effect increases with every info box you add to a Window. You probably also noticed the next thing I address: the position of Tab controls.
5. A nicer default position for Tab controls
When you insert a control into a Window its layout position is left undefined. This also goes for Tab controls. When you insert them initially it looks like they're in the right place, but if you refresh the design window, they show up at a default position of zero. Not helpful. In most cases you want them below the display of the columns of the main table in the Info Window. You don't want to move every individual Tab control. So, we need a little hack here:
Steps
- (Assuming you still have the Designer and Generic Info Box open) choose the menu option: "Controls for Style Sheet" from the menu item "Design"
- Select the Tab Control
- Open the Property Inspector.
- Select the Layout property "position". Hey, wait that doesn't exist! Therefore, we pick minimum width instead.
- Change the value (200) to something higher than 20. I usually pick 30 or 40.
- Save your change.
- Close the Windows Designer.
The value 20 comes from the default position of the ColumnBox. We want the Tab control to be positioned behind that. As a small extra, you can select the tab page 1 control, and change its Border type from "Single Sunken" to None.
Now we get to the tricky part, we're going to change something in the Definer to get a GUI change. This would be a good moment to create a backup, e.g. make an export of the Definer with USoft Benchmark.
- After the backup, open the Definer.
- In the Objects list select the Window "XS Type Occurrences". It's one up from the bottom of the list.
- search for typename = Generic.
The Window should look like this: Application: {your application name in uppercase}, Class ID: {id} followed by Generic, Original: {same id}, typename: Generic. To the left a list with controls is displayed. One of them should be "Tab".
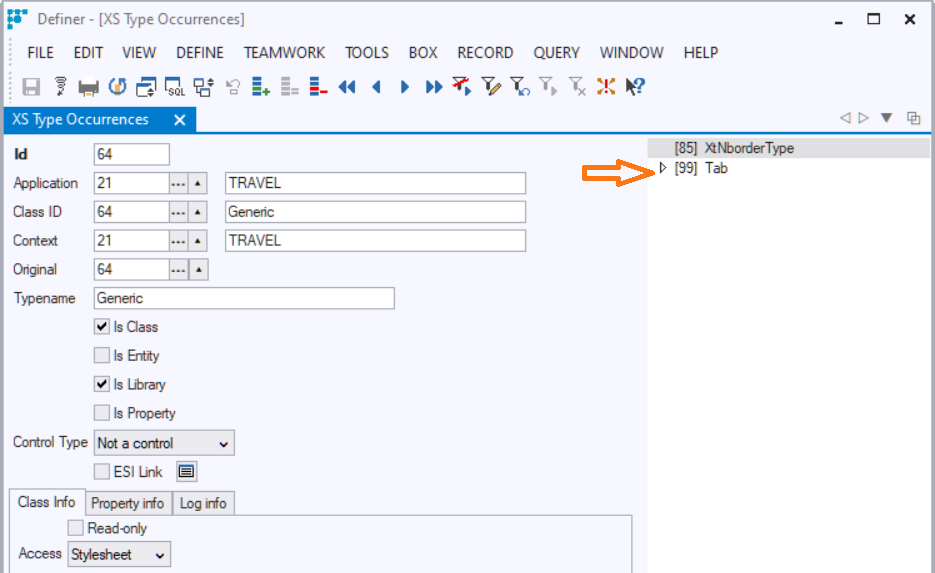
- Double-click on Tab. A new instance of "XS Type Occurrences" should open, showing the Tab Control and to the left a list of type occurrences. One of them is "XtNwidth".
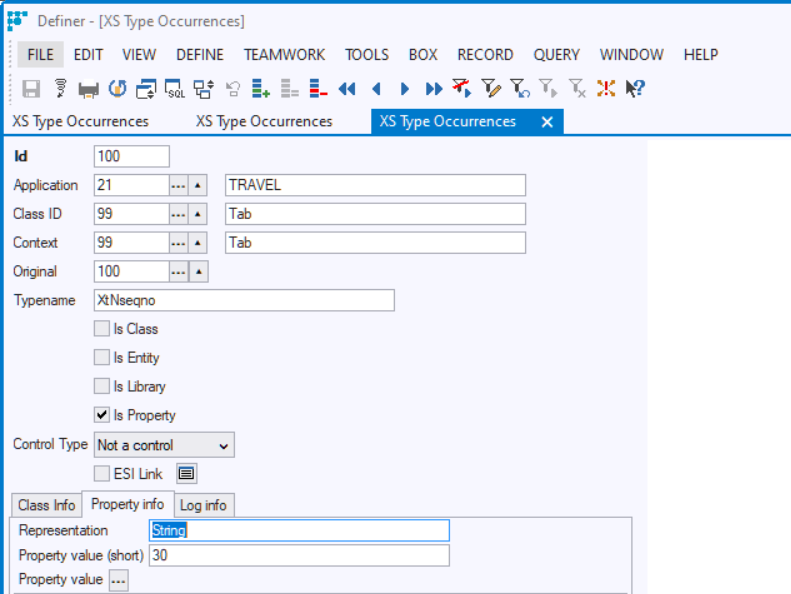
- Double-click on XtNwidth. Yet another "XS Type Occurrences" window opens.
- Rename "XtNwidth" to XtNseqno.
- Save your change.
Be aware that the Windows Designer will not show this property and its value in the Property Inspector. Only when you add a Tab control to an Info Box, the position setting will appear. Another way to see the setting is to select the Style sheet Generic in the Catalog and from the secondary mouse button menu choose "Report". The Xml report will show the data. Also keep in mind that changing the External layer manually in the way described is officially not supported. You will need the backup if somehow you cannot.
Enjoy painting!
Robert Hellinx.